Create A REST API With JSON Server
Create A REST API With JSON Server
This post has been published first on CodingTheSmartWay.com.
A common task for front-end developers is to simulate a backend REST service to deliver some data in JSON format to the front-end application and make sure everything is working as expected.
Of course you can setup a full backend server, e.g. by using Node.js, Express and MongoDB. However this takes some time and a much simpler approach can help to speed up front-end development time.
JSON Server is a simple project that helps you to setup a REST API with CRUD operations very fast. The project website can be found at https://github.com/typicode/json-server.
In the following you’ll lean how to setup JSON server and publish a sample REST API. Furthermore you’ll see how to use another library, Faker.js, to generate fake data for the REST API which is exposed by using JSON server.
Installing JSON Server
JSON Server is available as a NPM package. The installation can be done by using the Node.js package manager:
$ npm install -g json-server
By adding the
-g option we make sure that the package is installed globally on your system.JSON File
Now let’s create a new JSON file with name db.json. This file contains the data which should be exposed by the REST API. For objects contained in the JSON structure CRUD entpoints are created automatically. Take a look at the following sample db.json file:
{
  "employees": [
    {
      "id": 1,
      "first_name": "Sebastian",
      "last_name": "Eschweiler",
      "email": "sebastian@codingthesmartway.com"
    },
    {
      "id": 2,
      "first_name": "Steve",
      "last_name": "Palmer",
      "email": "steve@codingthesmartway.com"
    },
    {
      "id": 3,
      "first_name": "Ann",
      "last_name": "Smith",
      "email": "ann@codingthesmartway.com"
    }
  ]
}
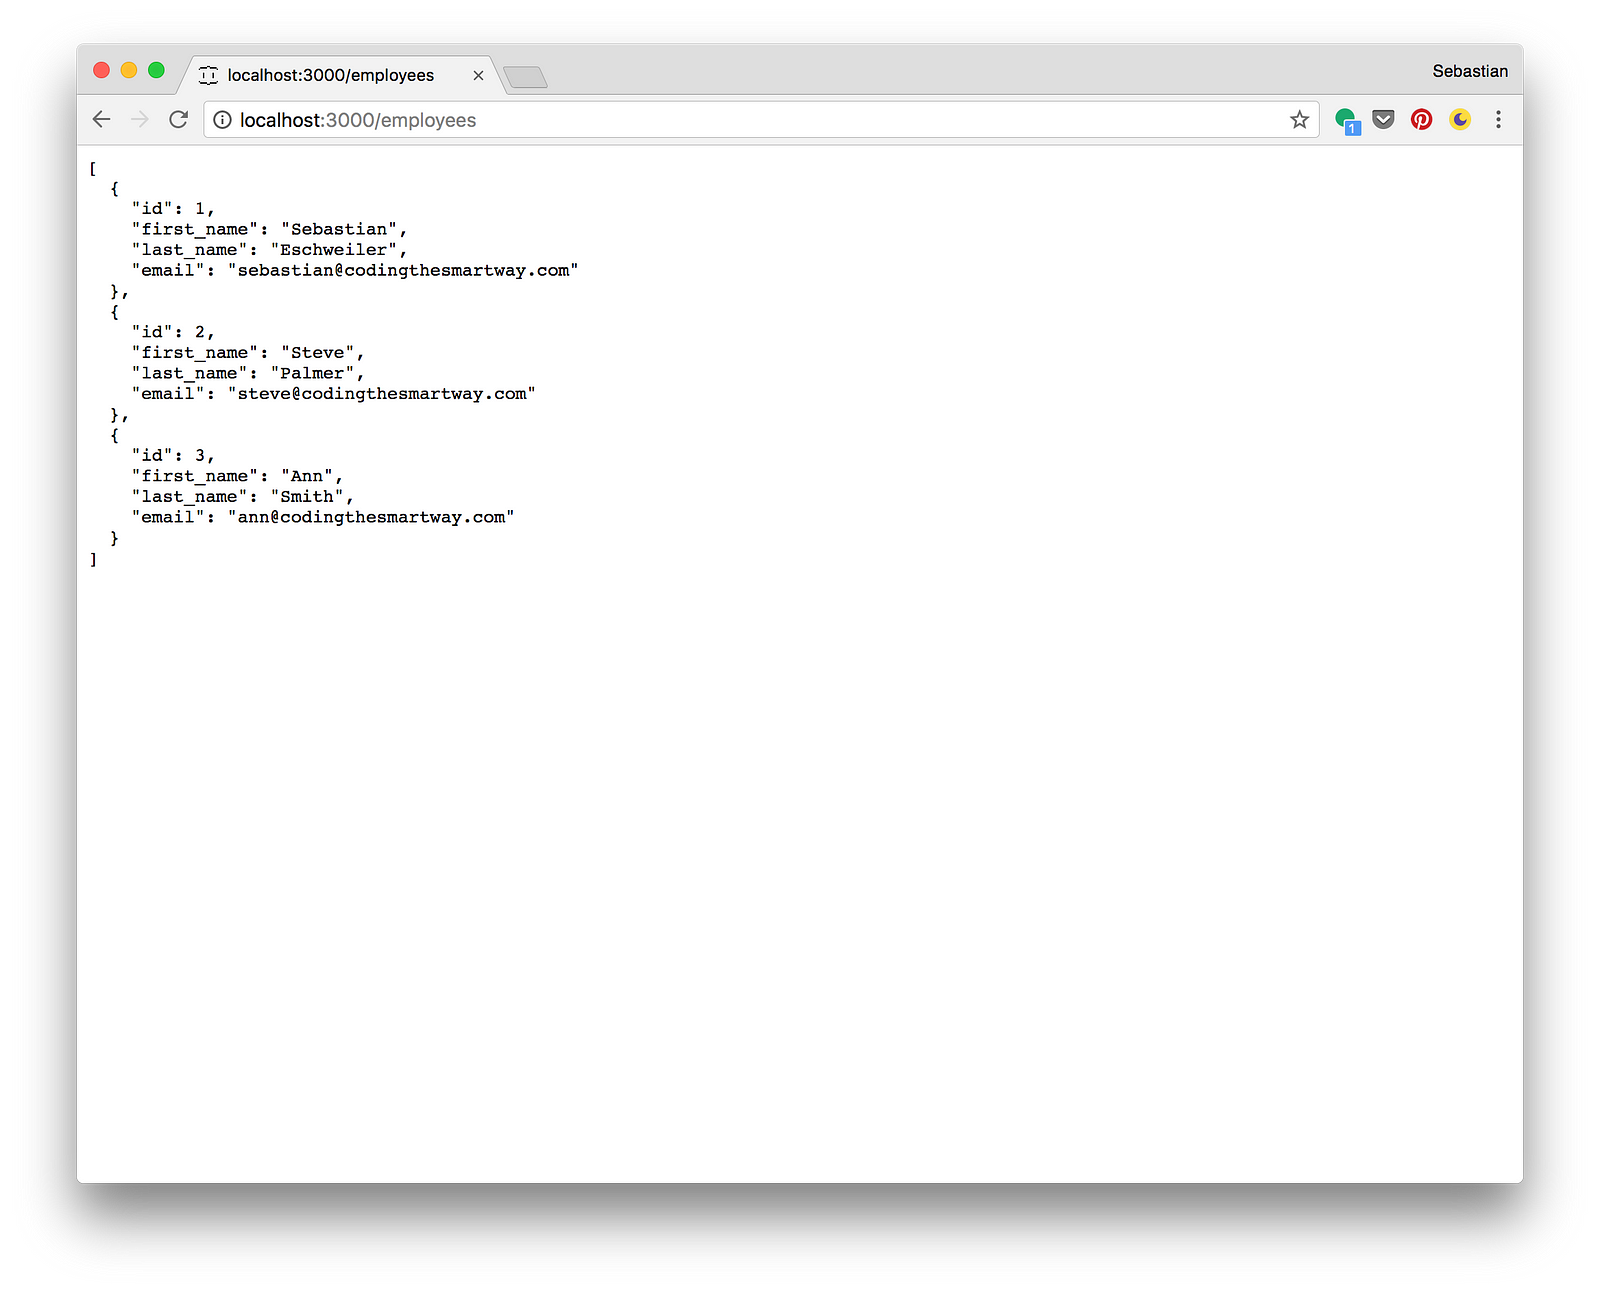
The JSON structure consists of one employee object which has three data sets assigned. Each employee object is consisting of four properties: id, first_name, last_name and email.
Running The Server
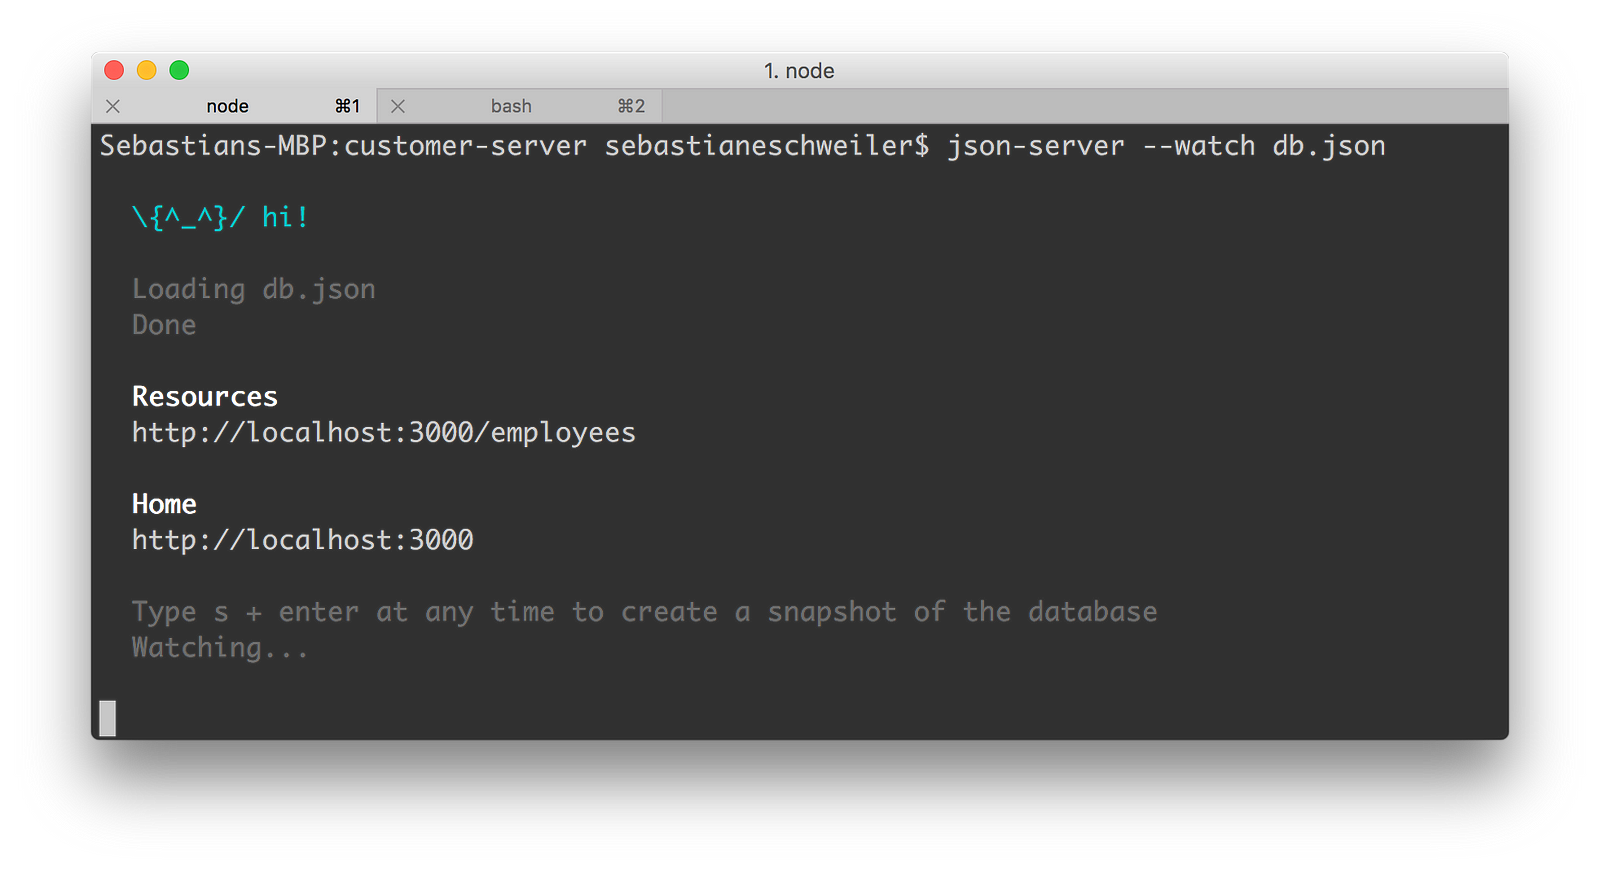
Let’s start JSON server by executing the following command:
$ json-server --watch db.json
As a parameter we need to pass over the file containing our JSON structure (db.json). Furthermore we’re using the — watch parameter. By using this parameter we’re making sure that the server is started in watch mode which means that it watches for file changes and updates the exposed API accordingly.
Now we can open URL http://localhost:3000/employees in the browser and we’ll get the following result:
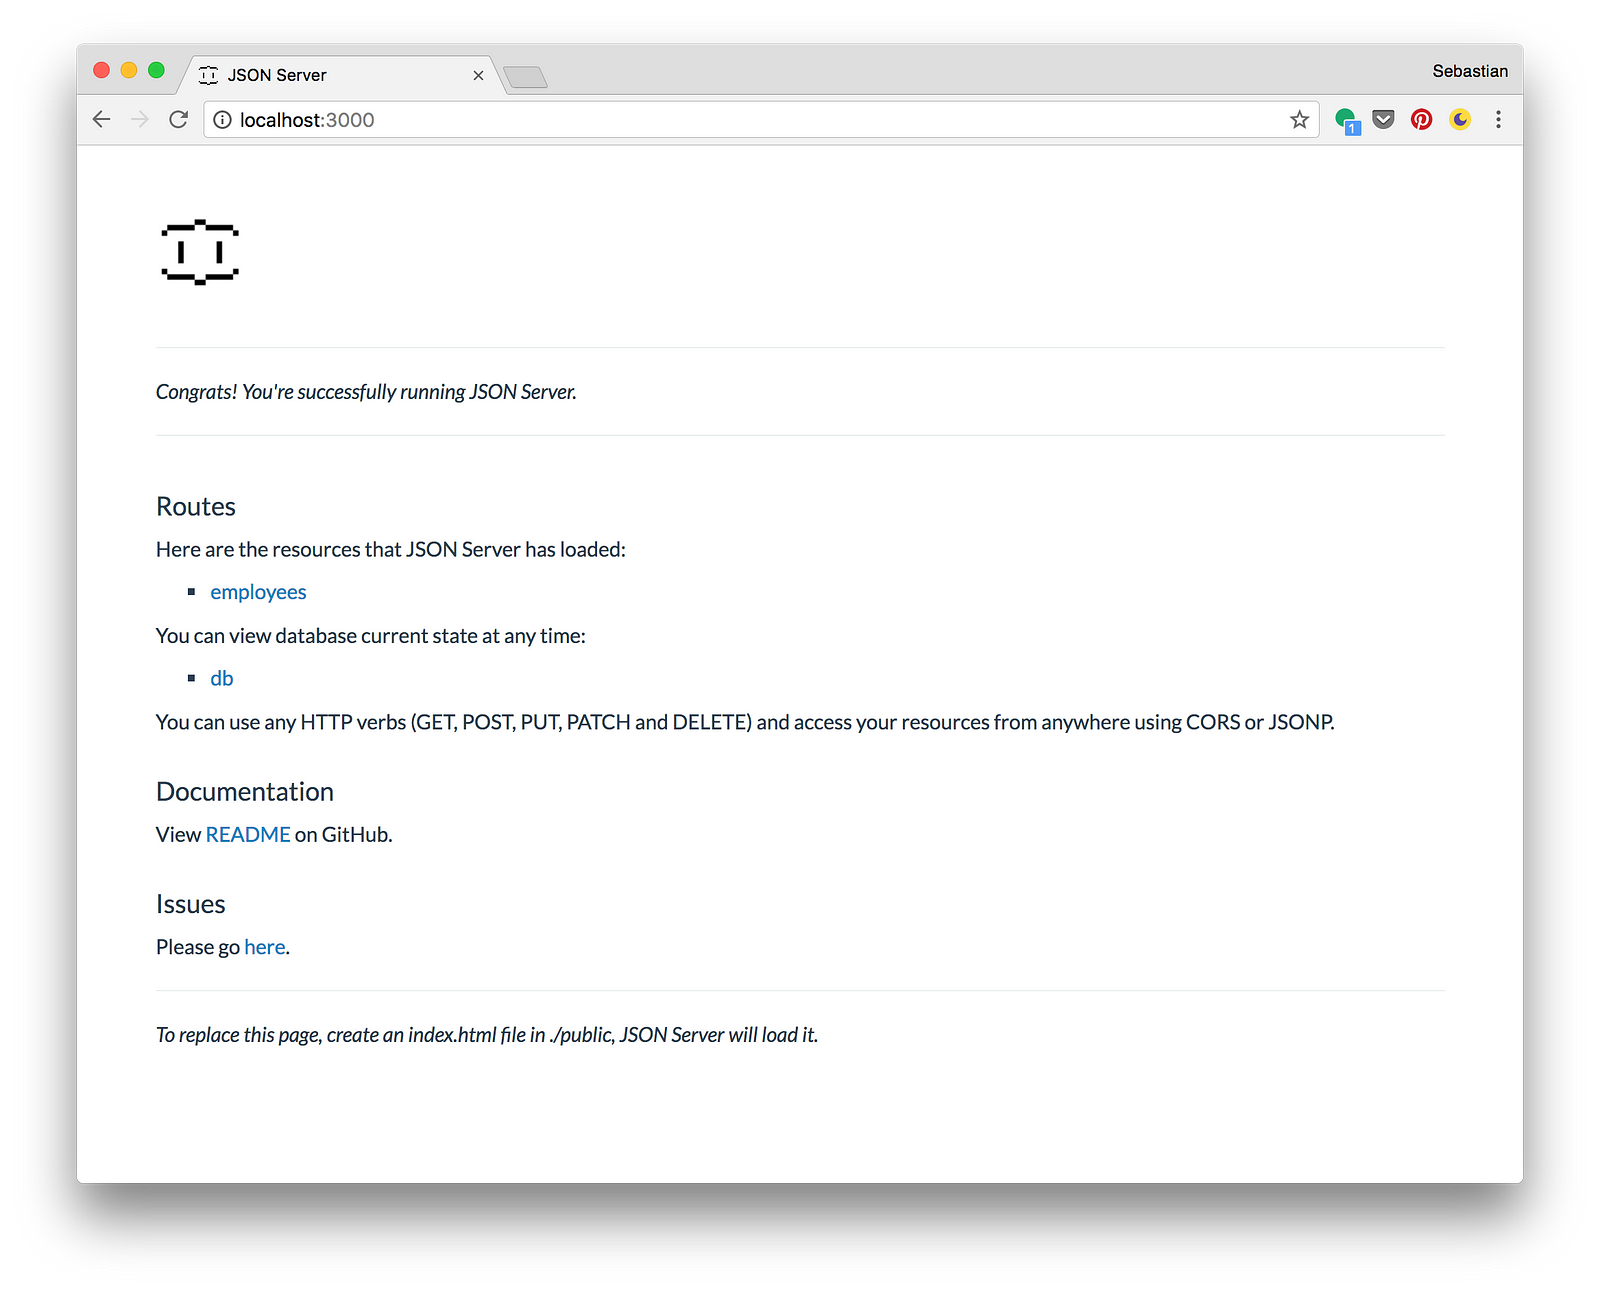
From the output you can see that the employees resource has been recognized correctly. Now you can click on the employees link and a HTTP GET request to http://localhost:3000/employees shows the following result:
The following HTTP endpoints are created automatically by JSON server:
GET    /employees
GET    /employees/{id}
POST   /employees
PUT    /employees/{id}
PATCH  /employees/{id}
DELETE /employees/{id}
If you make POST, PUT, PATCH or DELETE requests, changes will be automatically saved to db.json. A POST, PUT or PATCH request should include a
It's possible to extend URLs with further parameter. E.g. you can apply filtering by using URL parameters like you can see in the following:
http://localhost:3000/employees?first_name=Sebastian
This returns just one employee object as a result. Or just perform a full text over all properties:
http://localhost:3000/employees?q=codingthesmartway
For a full list of available URL parameters take a look at the JSON server documentation: https://github.com/typicode/json-server
Content-Type: application/json header to use the JSON in the request body. Otherwise it will result in a 200 OK but without changes being made to the data.It's possible to extend URLs with further parameter. E.g. you can apply filtering by using URL parameters like you can see in the following:
http://localhost:3000/employees?first_name=Sebastian
This returns just one employee object as a result. Or just perform a full text over all properties:
http://localhost:3000/employees?q=codingthesmartway
For a full list of available URL parameters take a look at the JSON server documentation: https://github.com/typicode/json-server
Testing API Endpoints With POSTman
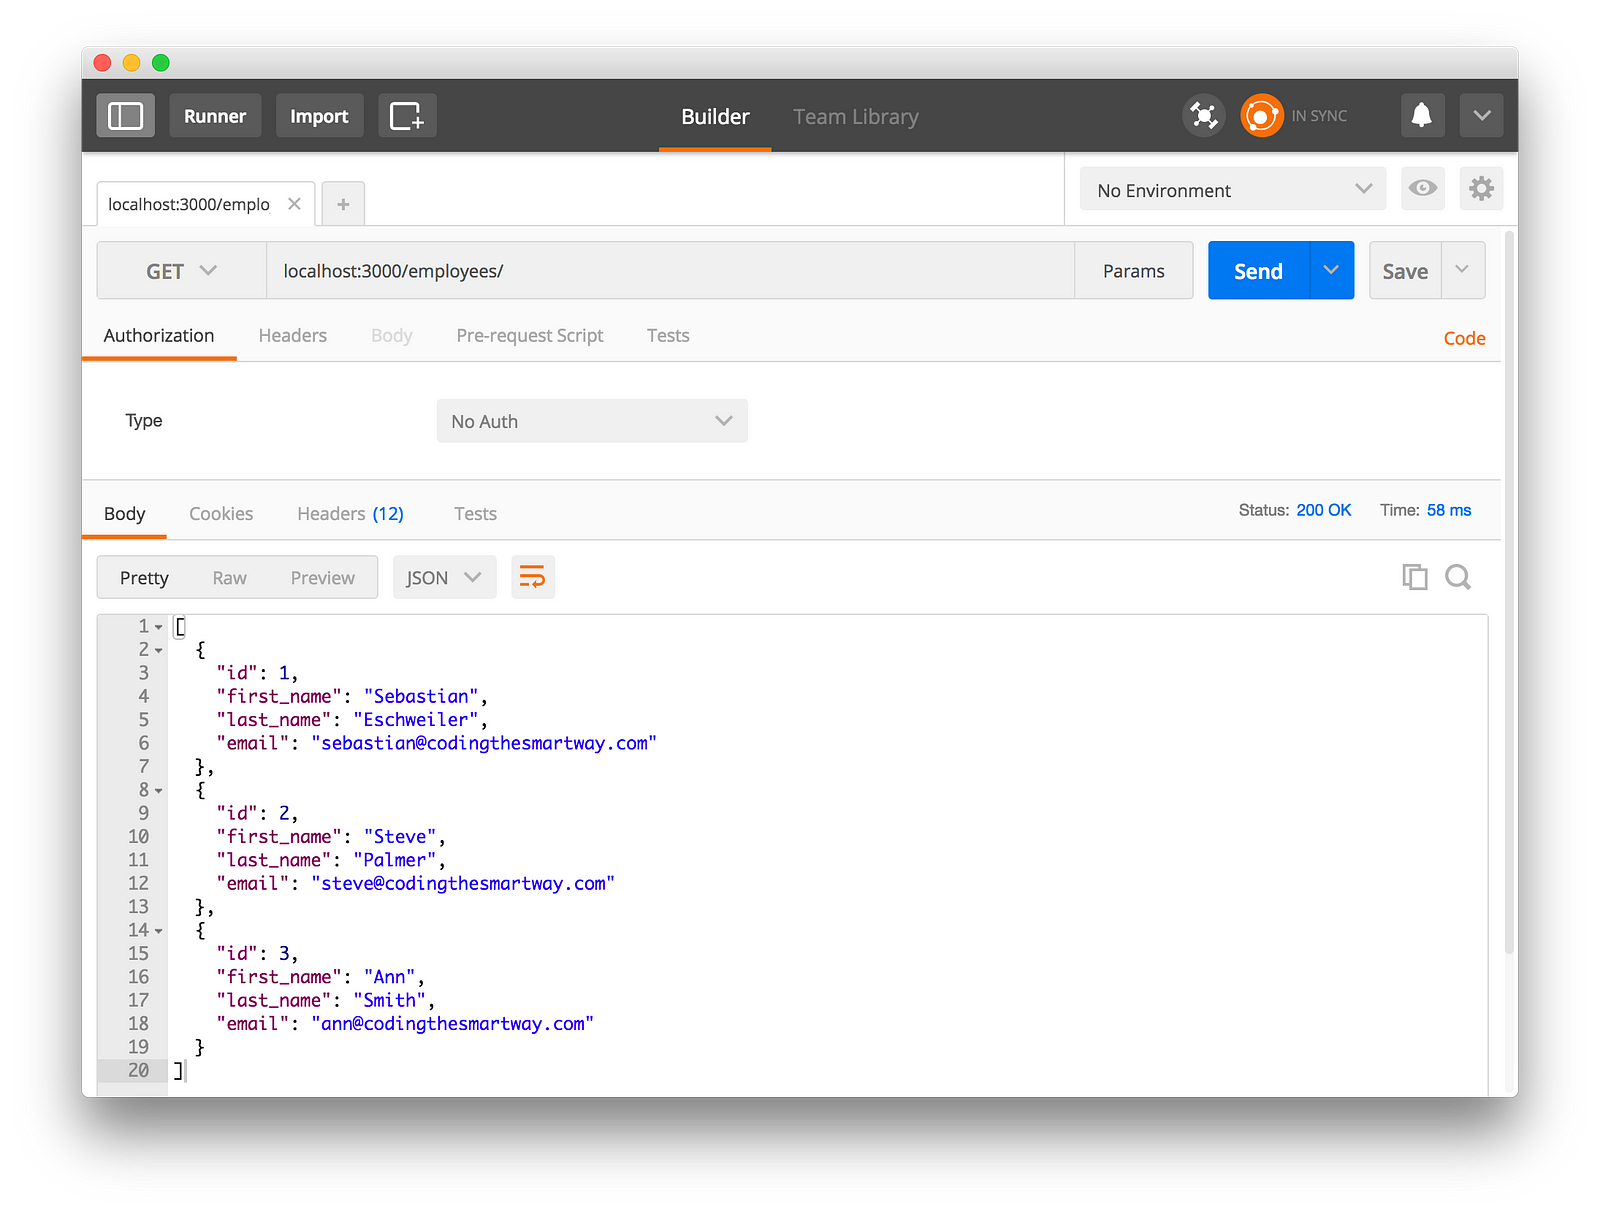
Initiating a GET request is easy by simply using the browser. For initiating other types of HTTP requests you can make use of an HTTP client tool like Postman (https://www.getpostman.com). Postman is available for MacOS, Windows and Linux. Furthermore Postman is available as a Chrome App.
Get Request
The Postman user interface is easy to use. To initiate a GET request fill out the form as you can see in the following screenshot. Click the Send button and you’ll receive the response in JSON format:
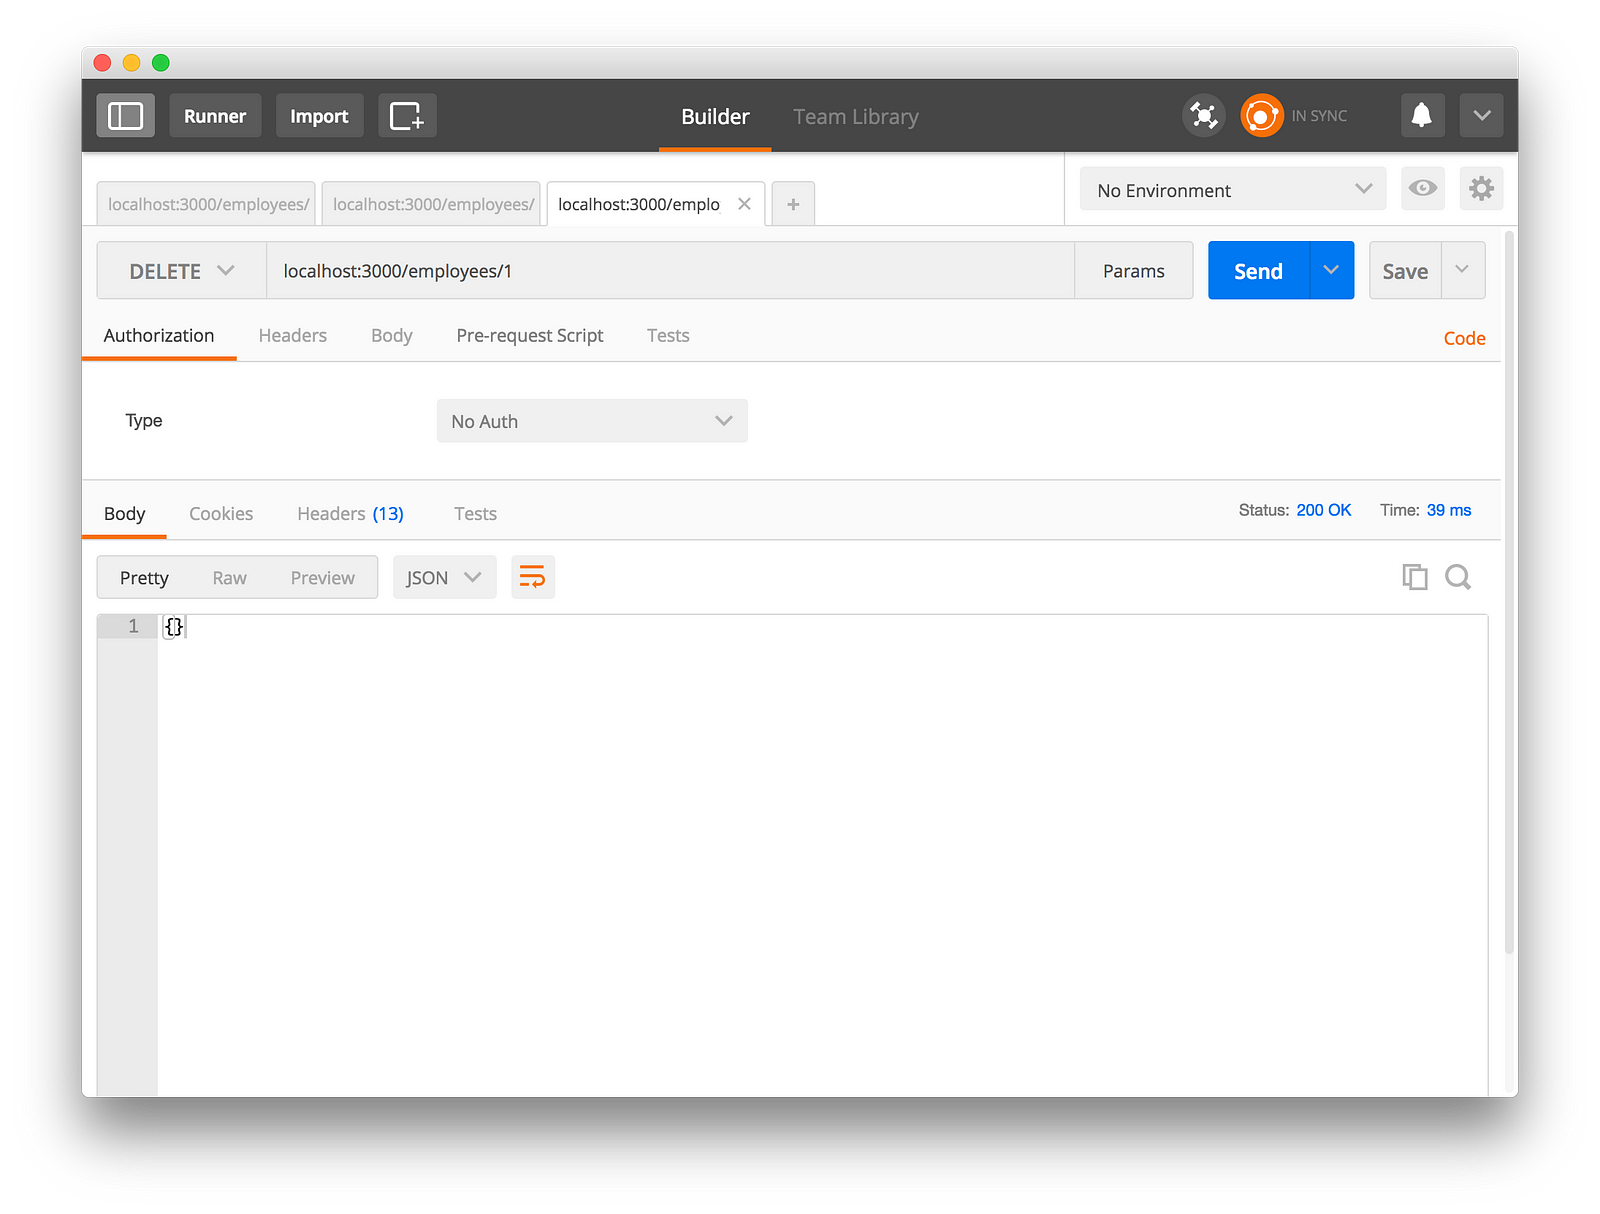
DELETE REQUEST
A corresponding delete request can be seen in the following screenshot:
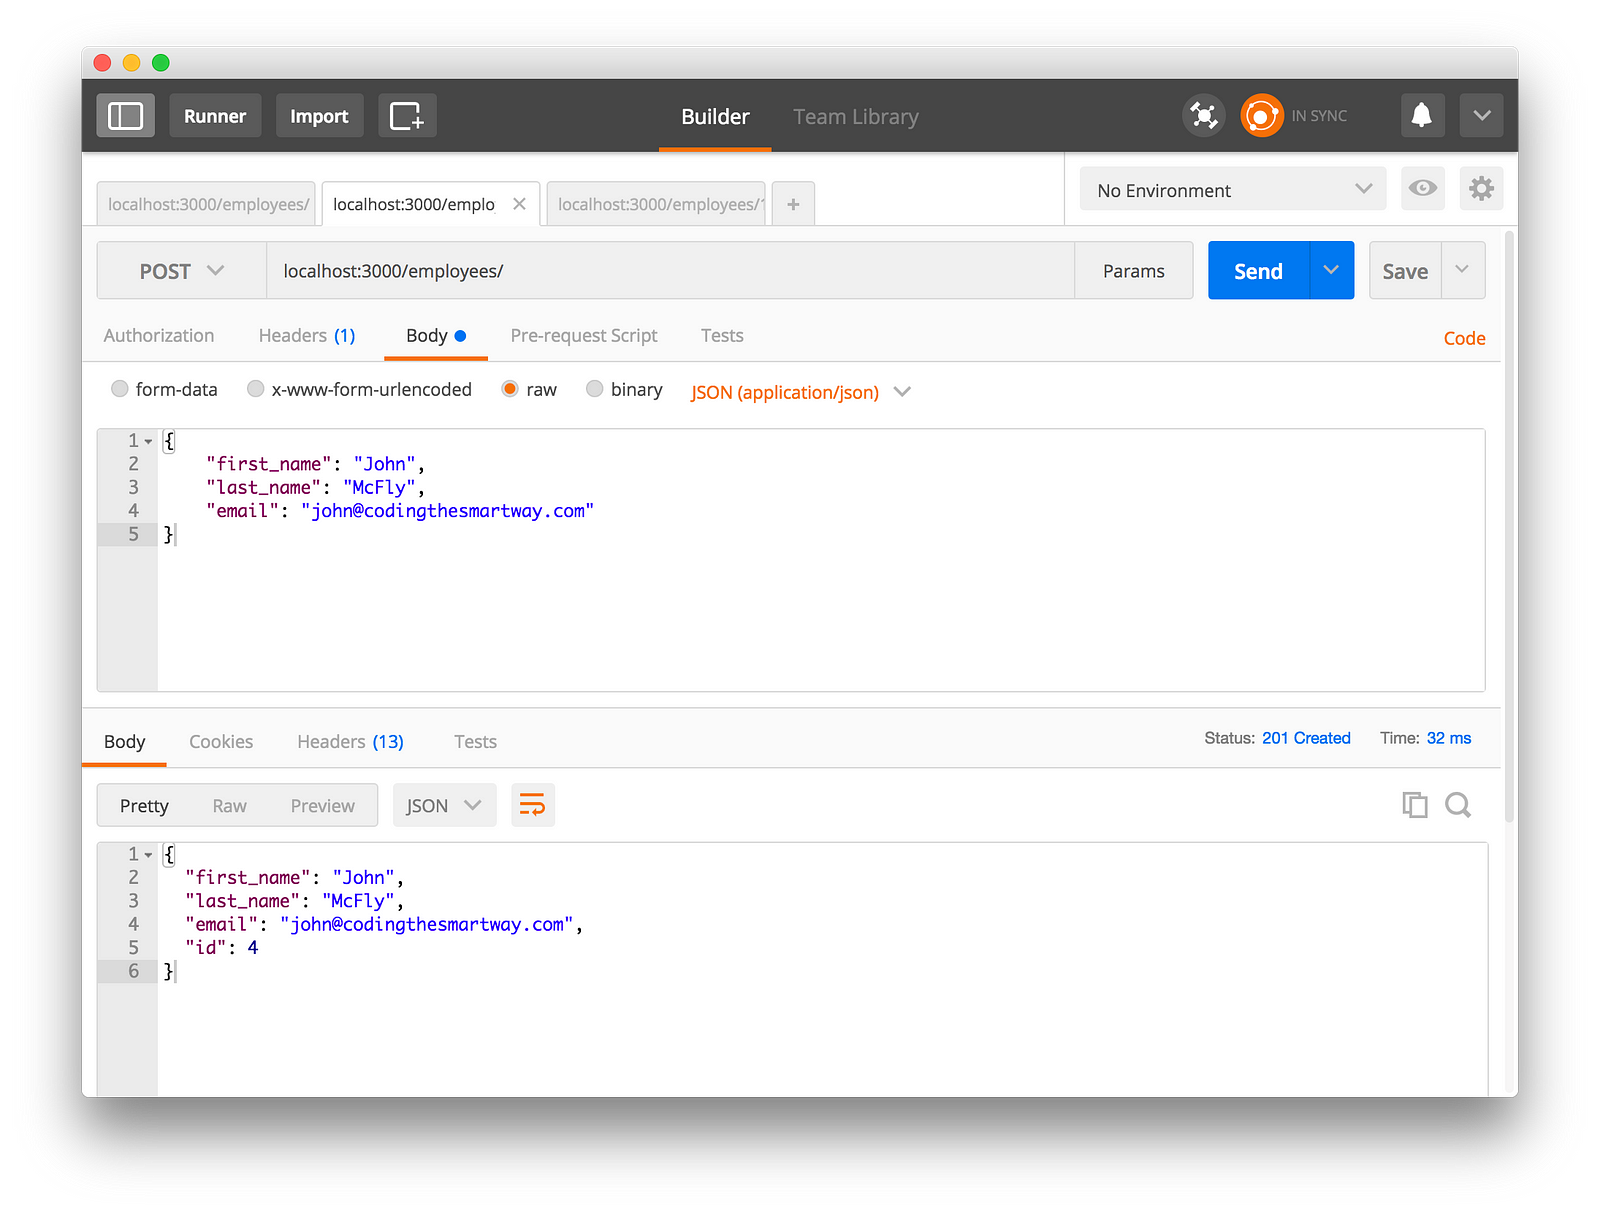
POST REQUEST
To create a new employee we need to perform a post request and set the body content type to JSON (application/json). The new employee object is entered in JSON format in the body data section:
PUT REQUEST
If you want to update or change an existing employee record you can use a HTTP PUT request:

Mocking Data with Faker.js
So far we’ve entered data exposed by the API manually in a JSON file. However, if you need a larger amount of data the manual way can be cumbersome. An easy solution to this problem is to use the Faker.js (https://github.com/marak/Faker.js/) library to generate fake data. Integration of Faker.js into JSON server is easy. Just follow the steps below:
First, let’s initialize a new NPM project in the current repository:
Next, install Faker.js by using the NPM package faker:
Faker.js is installed to the node_modules folder. Create another file employees.js an insert the following JavaScript code:
First, let’s initialize a new NPM project in the current repository:
$ npm initNext, install Faker.js by using the NPM package faker:
$ npm install fakerFaker.js is installed to the node_modules folder. Create another file employees.js an insert the following JavaScript code:
// employees.js
var faker = require('faker')
function generateEmployees () {
  var employees = []
  for (var id = 0; id < 50; id++) {
    var firstName = faker.name.firstName()
    var lastName = faker.name.lastName()
    var email = faker.internet.email()
    employees.push({
      "id": id,
      "first_name": firstName,
      "last_name": lastName,
      "email": email
    })
  }
  return { "employees": employees }
}
module.exports = generateEmployees
We’re implementing the function generateEmployees() to generate a JSON object containing 50 employees. To obtain the fake data for first name, last name and email we’re using the following methods from the Faker.js library:
- faker.name.firstName()
- faker.name.lastName()
- faker.internet.email()
JSON server requires that we finally export the generateEmploees() function which is responsible for fake data generation. This is done by using the following line of code:
Having added that export, we're able to pass file employee.js directly to the json-server command:
module.exports = generateEmployeesHaving added that export, we're able to pass file employee.js directly to the json-server command:
$ json-server employees.js
Now the exposed REST API gives you access to all 50 employee data sets created with Faker.js.
Video Tutorial
This video tutorial contains the steps described in the text above:

Comments
Post a Comment